Shantha Kumar T
Work with add-in web data using PnP JS library in the SharePoint Hosted Add-In
If we search across the any search engine, we will get lot of references on how to create a SharePoint hosted add-in using JSOM or REST API. But in this post, I'll cover a steps to create a SharePoint hosted Add-In to access the data from the Add-In web using PnP JavaScript Library from Napa add-in tool in SharePoint Online.
If we search across the any search engine, we will get lot of references on how to create a SharePoint hosted add-in using JSOM or REST API. But in this post, I’ll cover a steps to create a SharePoint hosted Add-In to access the data from the Add-In web using PnP JavaScript Library from Napa add-in tool in SharePoint Online.
SharePoint Add-In is an independent component which is used to include a new or expands the functionality to the SharePoint. The SharePoint Add-In can access data and use components between two webs called Host web and Add-In web.
Host Web: A SharePoint site used to install the SharePoint Add-In is called Host web.
Add-In Web: A special child web site will be created during the installation of Add-In and all the components mentioned in Add-In are deployed to the web is called Add-In web.
Quick References:
Introduction to PnP JavaScript Library
The following example, uses a PnP JavaScript Library to access the Lists available in Add-In web and shows the Add-In web title from the SharePoint Online.
Prerequisites:
- Developer Site Collection
- Napa Add-In tool or Visual Studio
- PnP, fetch and e6-promise js files
Getting start with SharePoint Add In
- Navigate to Developer Site Collection and then to the Site Contents page.
- Click “Napa” Office 365 Development Tools link or Tile from Site Content Page. This will open a Napa tool in a new window.
- The Napa tool, will lists out the existing created Add-Ins. From the same page click “Add New Project” tile
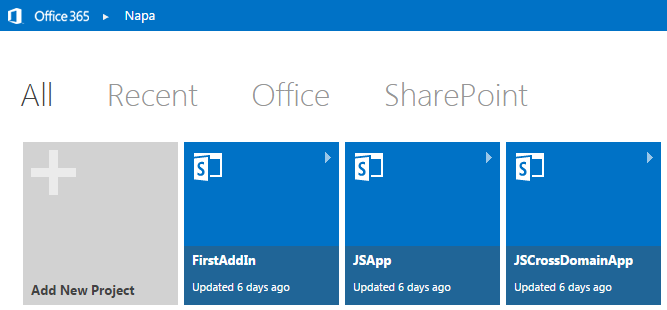
- That’ll redirect us to Add-In create page. There we have different options for creating the SharePoint or Office Add-Ins.
- Select “SharePoint Add-in” type and enter project name as “pnpSharePointAddinTest” for the add-in name in the “Project name” textbox. Then Click “Create” button.

- In the Add-in application, select “Properties” icon to update properties to the Add-in.
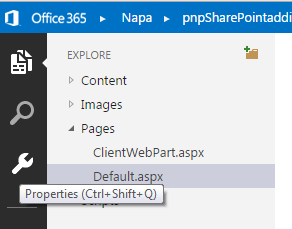
- Modify the project title as user friendly name, for example enter “PnP SharePoint Add-In Web Testing application”. Leave the other fields as default. Then click “Apply” button available on bottom of the page under left navigation.

- Remove the unrequired JavaScript file references from the Default.aspx page. In our example, we will remove the jquery, sp.js and sp.runtime js files.
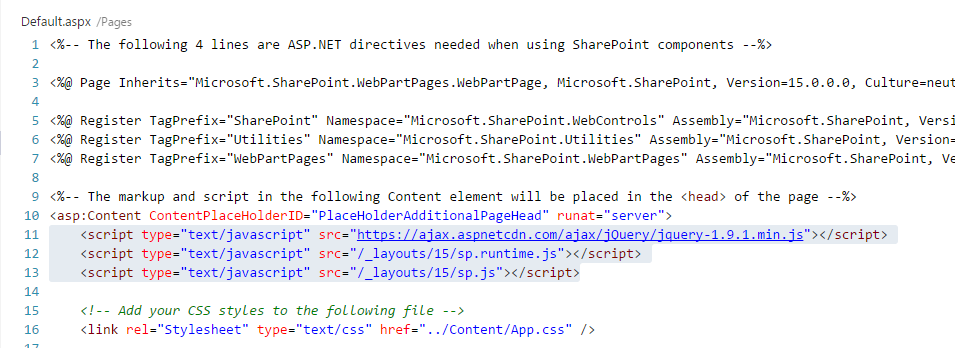
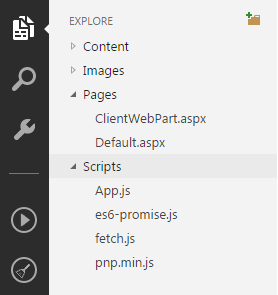
- Add the required files (pnp.min.js, fetch.js and es6-promise.js) to the Scripts folder.
- After uploading the files, open Default.aspx page and add the below JavaScript file reference lines within PlaceHolderAdditionalPageHead content place holder.
[code language=”javascript”]
<script type="text/javascript" src="../scripts/fetch.js"></script>
<script type="text/javascript" src="../scripts/es6-promise.js"></script>
<script type="text/javascript" src="../scripts/pnp.min.js"></script>
[/code]
- Now, open “App.js” file and remove all the lines and replace with below lines,
[code language=”javascript”]
‘use strict’;
function pnpReady() {
//Retrieve Web Title and collection of Lists from the current web
$pnp.sp.web.expand("Lists").select("Title,Lists").get().then(function(result) {
var contetTypeInfo = "<strong>Lists from website: " + result.Title + "</strong><br/>";
for (var i = 0; i < result.Lists.length; i++) {
contetTypeInfo += "Name: " + result.Lists[i].Title + "<br/>ID:" + result.Lists[i].Id + "<br/><br/>";
}
document.getElementById("message").innerHTML = contetTypeInfo;
}).catch(function(err) {
alert(err);
});
}
//Call the PnP method after the page load
document.addEventListener(‘DOMContentLoaded’, function() {
pnpReady();
});
[/code]
- After adding the lines, the app.js file will look like as below,
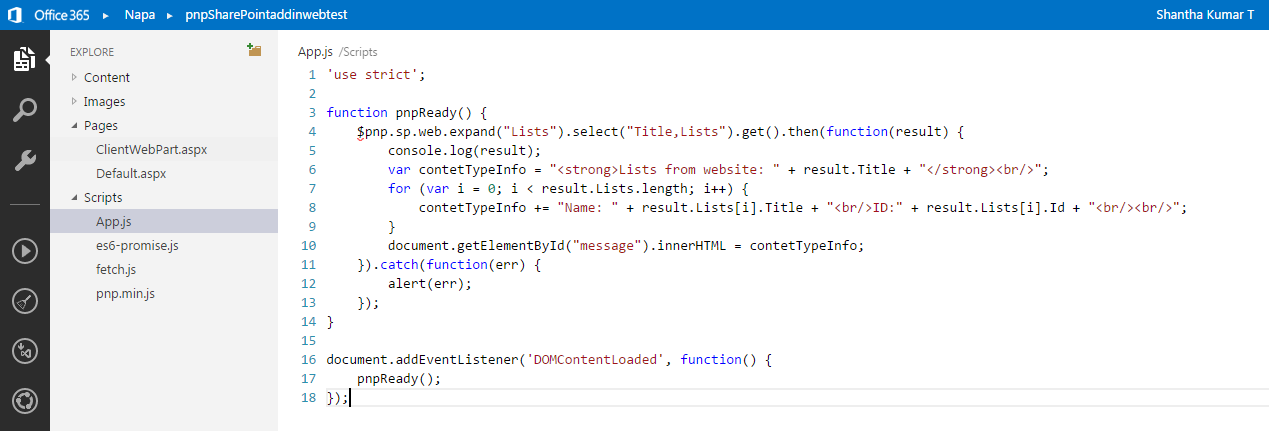
The code in the example shows the current website Title and populates the lists (ID and Title) available in the web.
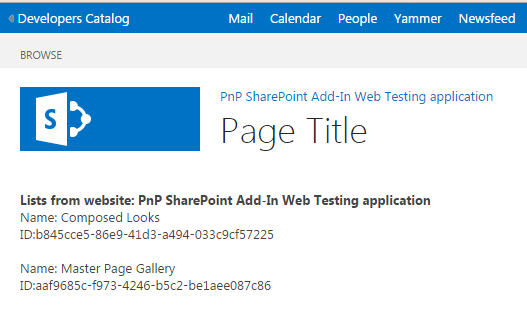
Output:
From this article, we have learned on how to create a SharePoint add-in to access information from Add-In web using PnP JavaScript Library.