Shantha Kumar T
Create SharePoint List in Office 365 using Microsoft Graph Explorer
Here, you can learn on how to create a new SharePoint custom list using Microsoft Graph Explorer.
Microsoft Graph Explorer is a browser based REST API client for Office 365. By using Graph explorer, we can access all applications / services in Microsoft Cloud by sending the Microsoft Graph API request.
Microsoft Graph API is a single endpoint with single authentication to access all Microsoft cloud services like Office 365 (OneDrive, SharePoint, etc..), Windows and Enterprise + Mobility.
Here, we are going to see on how to create a list in SharePoint Online using Microsoft Graph Explorer.
Authenticate and Permission Setup
- Navigate to Graph Explorer https://developer.microsoft.com/en-us/graph/graph-explorer
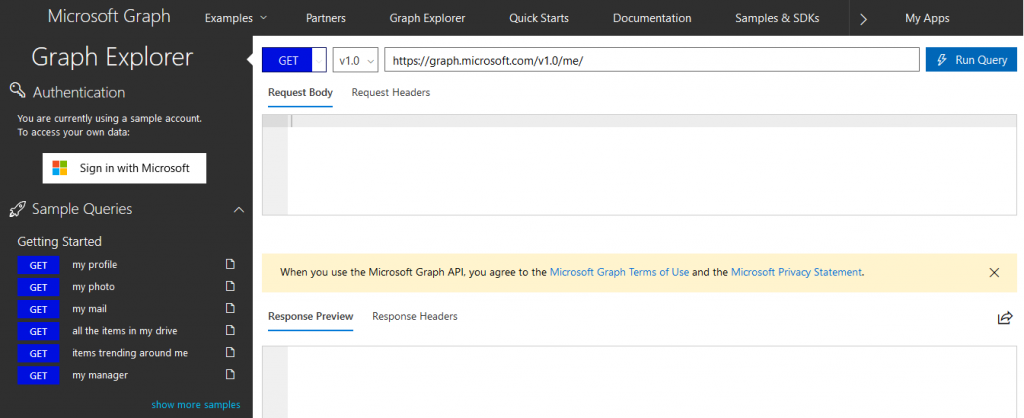
Microsoft Graph Explorer - Authenticate with Office 365 account by using Sign in with Microsoft button. After Authentication, the Sign in with Microsoft button is replaced by account information.

Microsoft Graph Explorer with sign in User


Note:
- Graph Explorer also works with sample data, if you are not authenticated. To access the actual information, you have to sign in to the Office 365.
- Before creating a list, we need to get the SharePoint site. The following rest endpoint used to get the SharePoint site based on the relative url,
REST End Point: https://graph.microsoft.com/v1.0/sites/ktskumar.sharepoint.com:/sites/dev- Format: https://graph.microsoft.com/v1.0/sites/{host name}:{relative url}
- User should require permission to create a list. So, we have to ensure Site.Manage.All permission is selected in Graph Explorer permissions.To ensure the permission, click modify permissions link.
- Select Site.Manage.All checkbox in the open dialog box.
- From the dialog box, click Modify Permissions button to apply the permissions to Graph Explorer application.
- This will automatically logout and login to the Microsoft Graph Explorer. Before auto signing in, application asks us to accept the permission scope. Click Accept button to accept the application to manage the lists in SharePoint Site Collections.
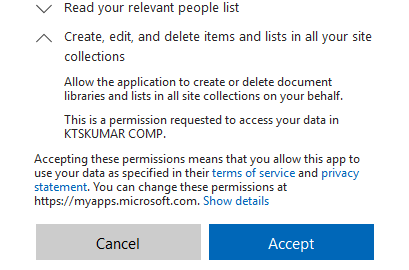
Microsoft Graph Explorer – Accept Permission Scopes
Graph Explorer
Now, we are ready for creating a List through Graph Explorer.
- Select the Post method from the method drop down.
- Enter the below Graph end point,
https://graph.microsoft.com/v1.0/sites/ktskumar.sharepoint.com:/sites/dev:/lists
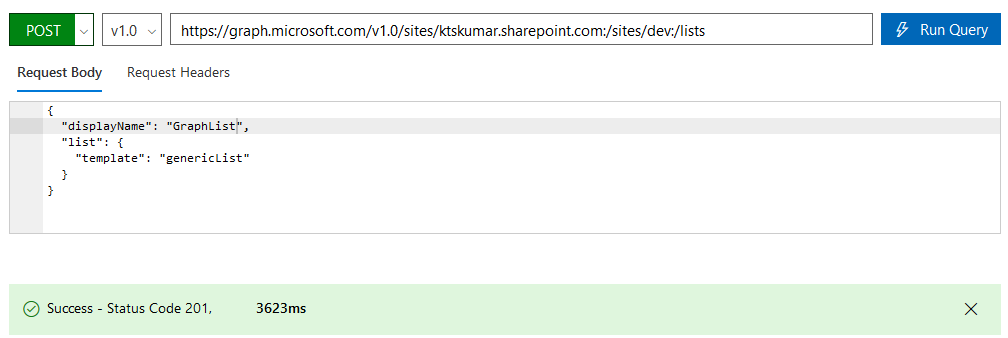
MS Graph Explorer – Request and Response - Enter the Request body in below format
[code lang=”js”]
{
"displayName": "GraphList",
"list": {
"template": "genericList"
}
}
[/code]displayName – Title for the list
list: variable for declaring list settings
template: child variable under list, refers to the list template type - Ensure the Request header
Key: Content-Type
Value: application/json - Then, click on Run Query button to send the request to create a new list called “GraphList” under https://ktskumar.sharepoint.com/site/dev
Output
After sending the request, our request will create a new list under the provided SharePoint site. Response Preview control shows the output in json format as provided below.
[code lang=”js”]
{
"@odata.context": "https://graph.microsoft.com/v1.0/$metadata#Collection(microsoft.graph.list)/$entity",
"@odata.etag": "\"f5fe8ccd-df1f-4aec-80d8-b375f650af9e,8\"",
"createdDateTime": "2018-06-26T11:06:39Z",
"description": "",
"eTag": "\"f5fe8ccd-df1f-4aec-80d8-b375f650af9e,8\"",
"id": "f5fe8ccd-df1f-4aec-80d8-b375f650af9e",
"lastModifiedDateTime": "2018-06-26T11:06:39Z",
"name": "GraphList",
"webUrl": "https://ktskumar.sharepoint.com/sites/dev/Lists/GraphList",
"displayName": "GraphList",
"createdBy": {
"user": {
"email": "admin@ktskumar.onmicrosoft.com",
"id": "4dccf644-24fd-4500-bb7f-311a4216bb73",
"displayName": "Shantha Kumar"
}
},
"parentReference": {},
"list": {
"contentTypesEnabled": false,
"hidden": false,
"template": "genericList"
}
}
[/code]
After navigation to the SharePoint site https://ktskumar.sharepoint.com/sites/dev in a browser; we can view the newly created list “GraphList” present under the site.
Create List with Custom Columns
To create a custom list with the custom columns, alter the Request body in below format. Add any column types under columns array in json.
[code lang=”js”]
{
"displayName": "GraphList",
"columns": [
{
"name": "Service",
"text": { }
},
{
"name": "AppCount",
"number": { }
}
],
"list": {
"template": "genericList"
}
[/code]
Columns: Array variable to have column information (name, <type>, …).
The above request, will create a SharePoint list called ‘GraphList’ with two additional custom columns (service as Single line of Text and AppCount as Number)


Shantha Kumar,
In my case I need to create a list not at the root of the site but in a sub-folder, for e.g. by default when you create a list just like how you have done, you notice in the webURL of the response the path being “https://ktskumar.sharepoint.com/sites/dev/Lists/GraphList”
Instead I want something like
“https://ktskumar.sharepoint.com/sites/root/Project//Lists/GraphList”
Upon asking in StackOverflow, I was suggested to use parentReference in the body (payload), and I did something like this
“parentReference”: {
“driveType”: “Documents”,
“driveId”: “{my-drive-id}”,
“path”: “/drives/{my-drive-id}/root:/Project/”
}
Still the end result is same it creates at the root as “https://ktskumar.sharepoint.com/sites/root/Lists/GraphList”
Any help is appreciated.