Shantha Kumar T
Unlock Efficiency: How to connect Microsoft Graph API with Microsoft Power Automate
The Microsoft Graph API is observed as effective because it claims numerous endpoints that link to various services within Microsoft 365. We must authenticate and authorize the request tin order to establish a connection and fetch data using this API.
For instance, we will utilize the Power Automate flow to retrieve all groups present within a tenant.
Setup App Registration
To authenticate the request call, we must create a new App Registration from Azure Portal. Follow the steps below to create a new registration,
- Navigate to Microsoft Azure Portal with the url, https://portal.azure.com
- Navigate to App Registrations or Search for App registrations from the Search box.
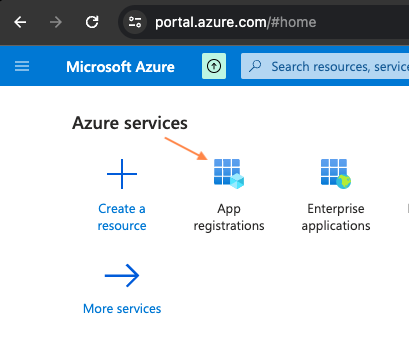
- In the App registrations page, click New registration toolbar link
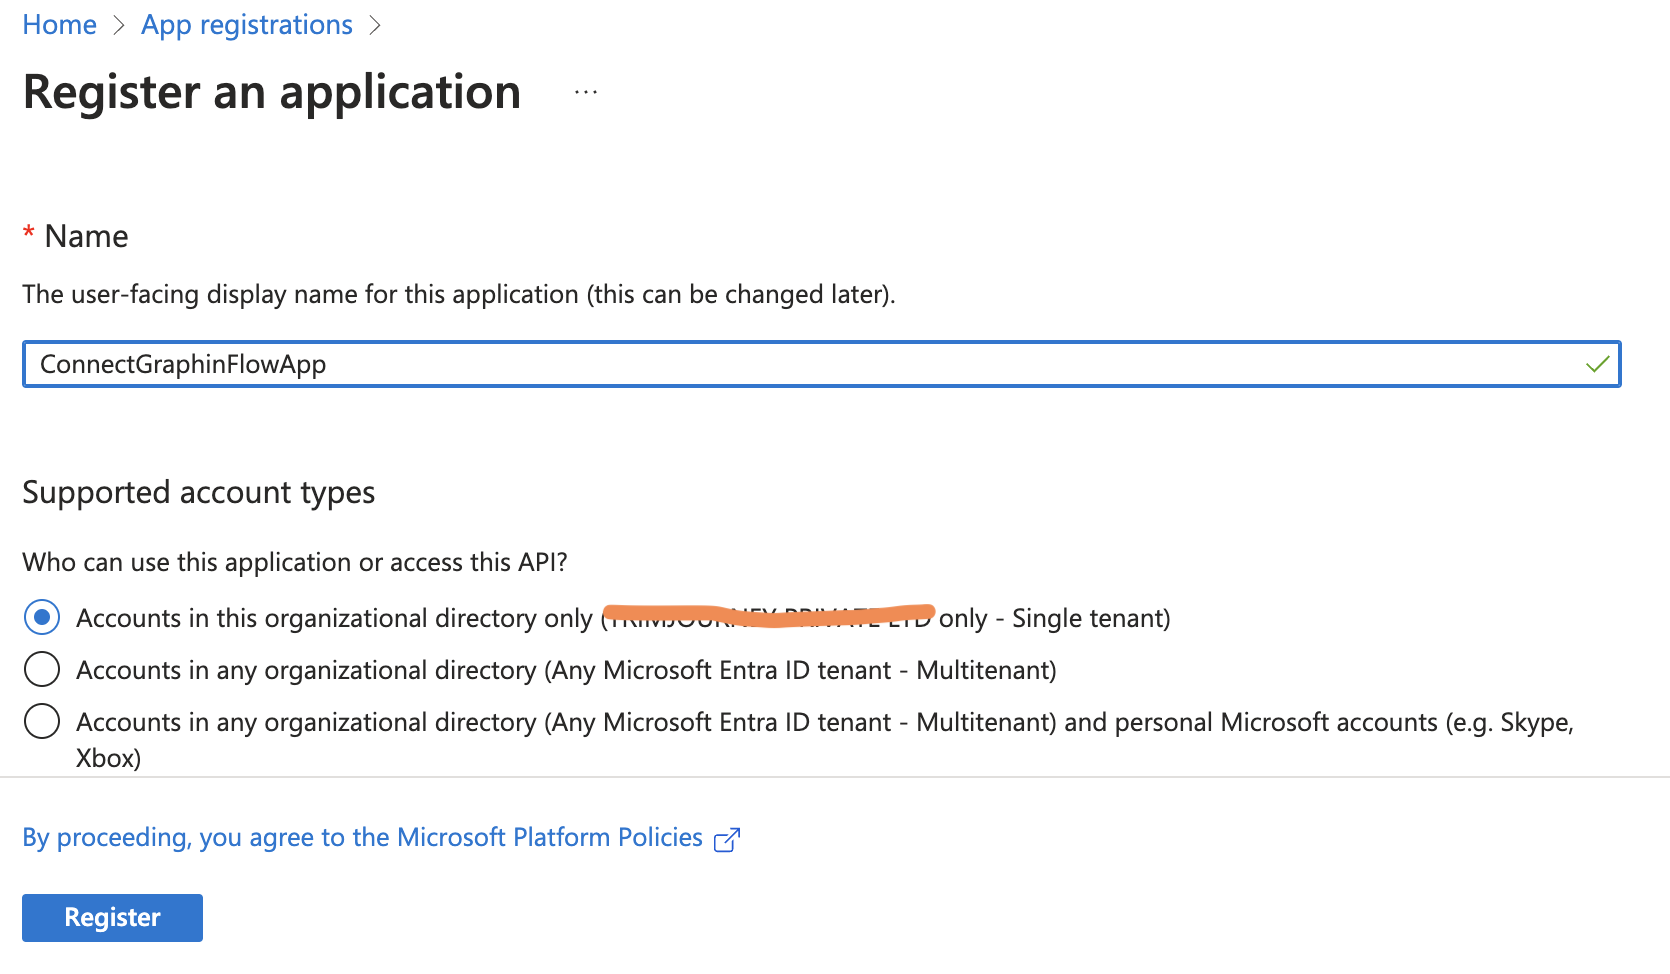
- In the opened Register an application page, fill-up the Name box.
- Select the Single Tenant account type and click Register button.
- Once the app is created successfully, proceed to the App overview page.
- On the left-hand side navigation menu, select Certificates & secrets.
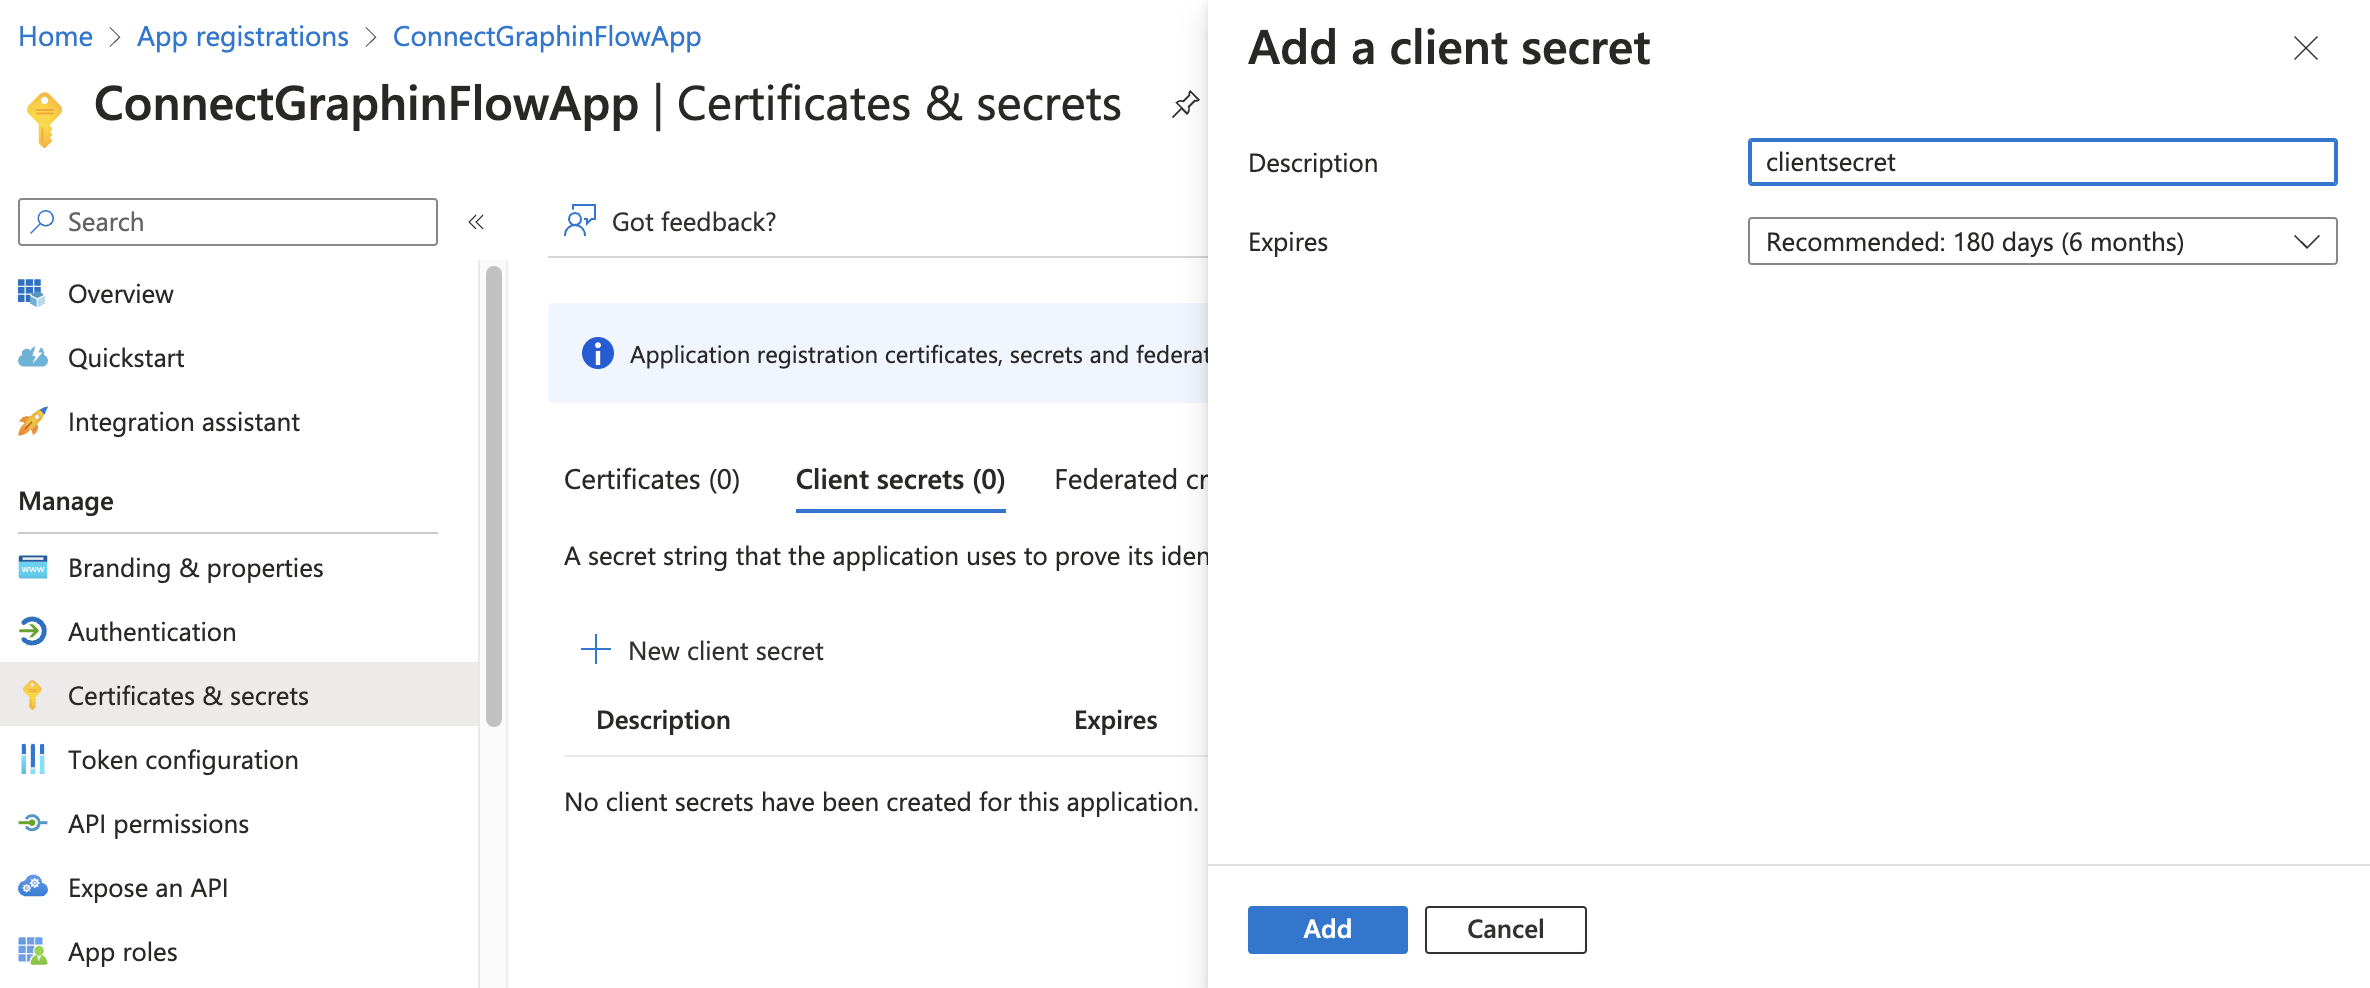
- Next, click on the New client secret button, provide a description, choose the Expires option and then click Add button to generate a secret value.
- Then copy the secret value.

- From the overview page, copy both the client ID and tenant ID.
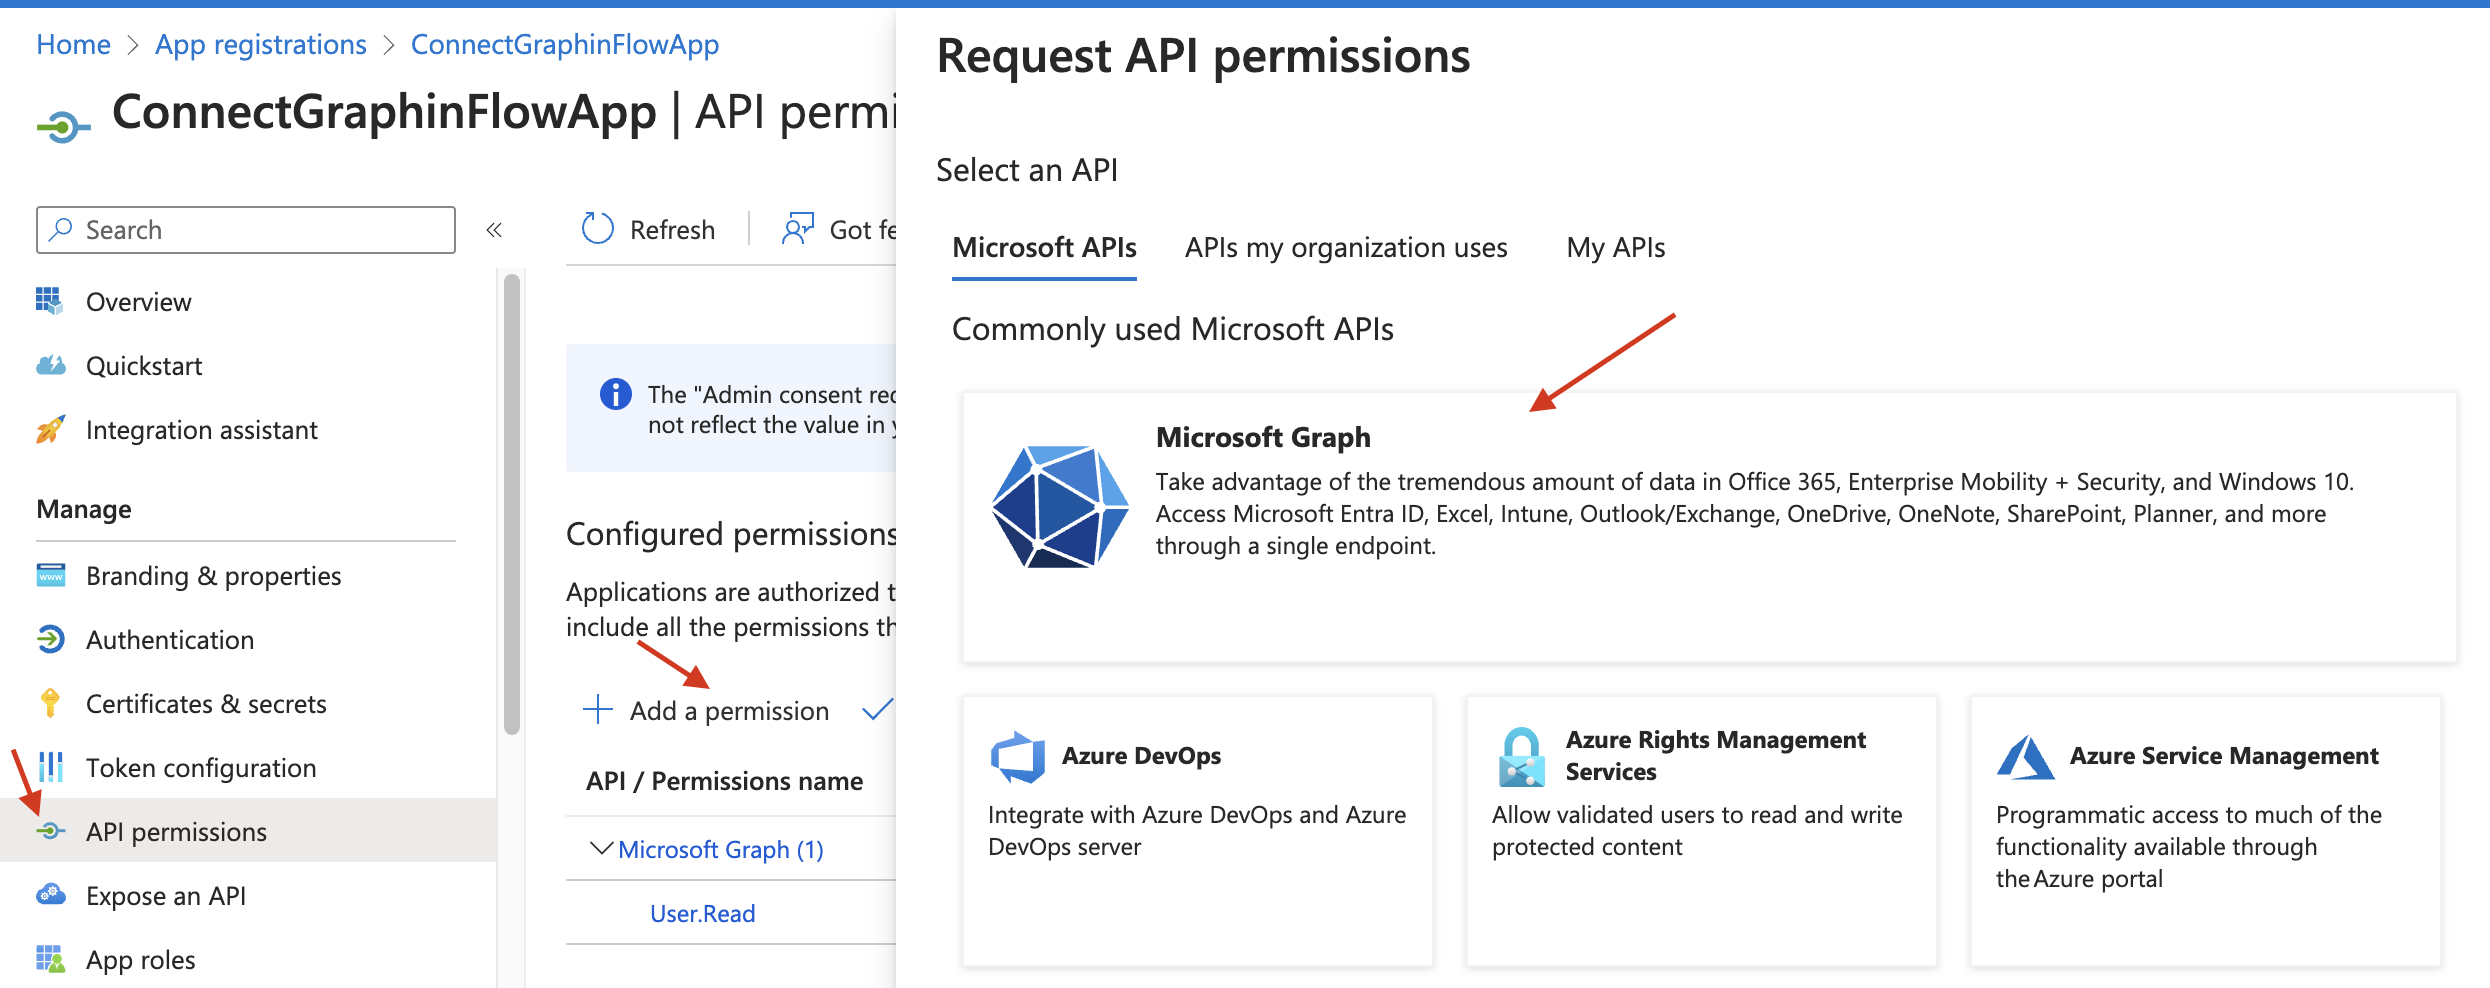
- Navigate to API Permissions using the left-hand navigation.
- Click the Add a permission button in the toolbar.
- In the right-side pane that opens, choose Microsoft Graph
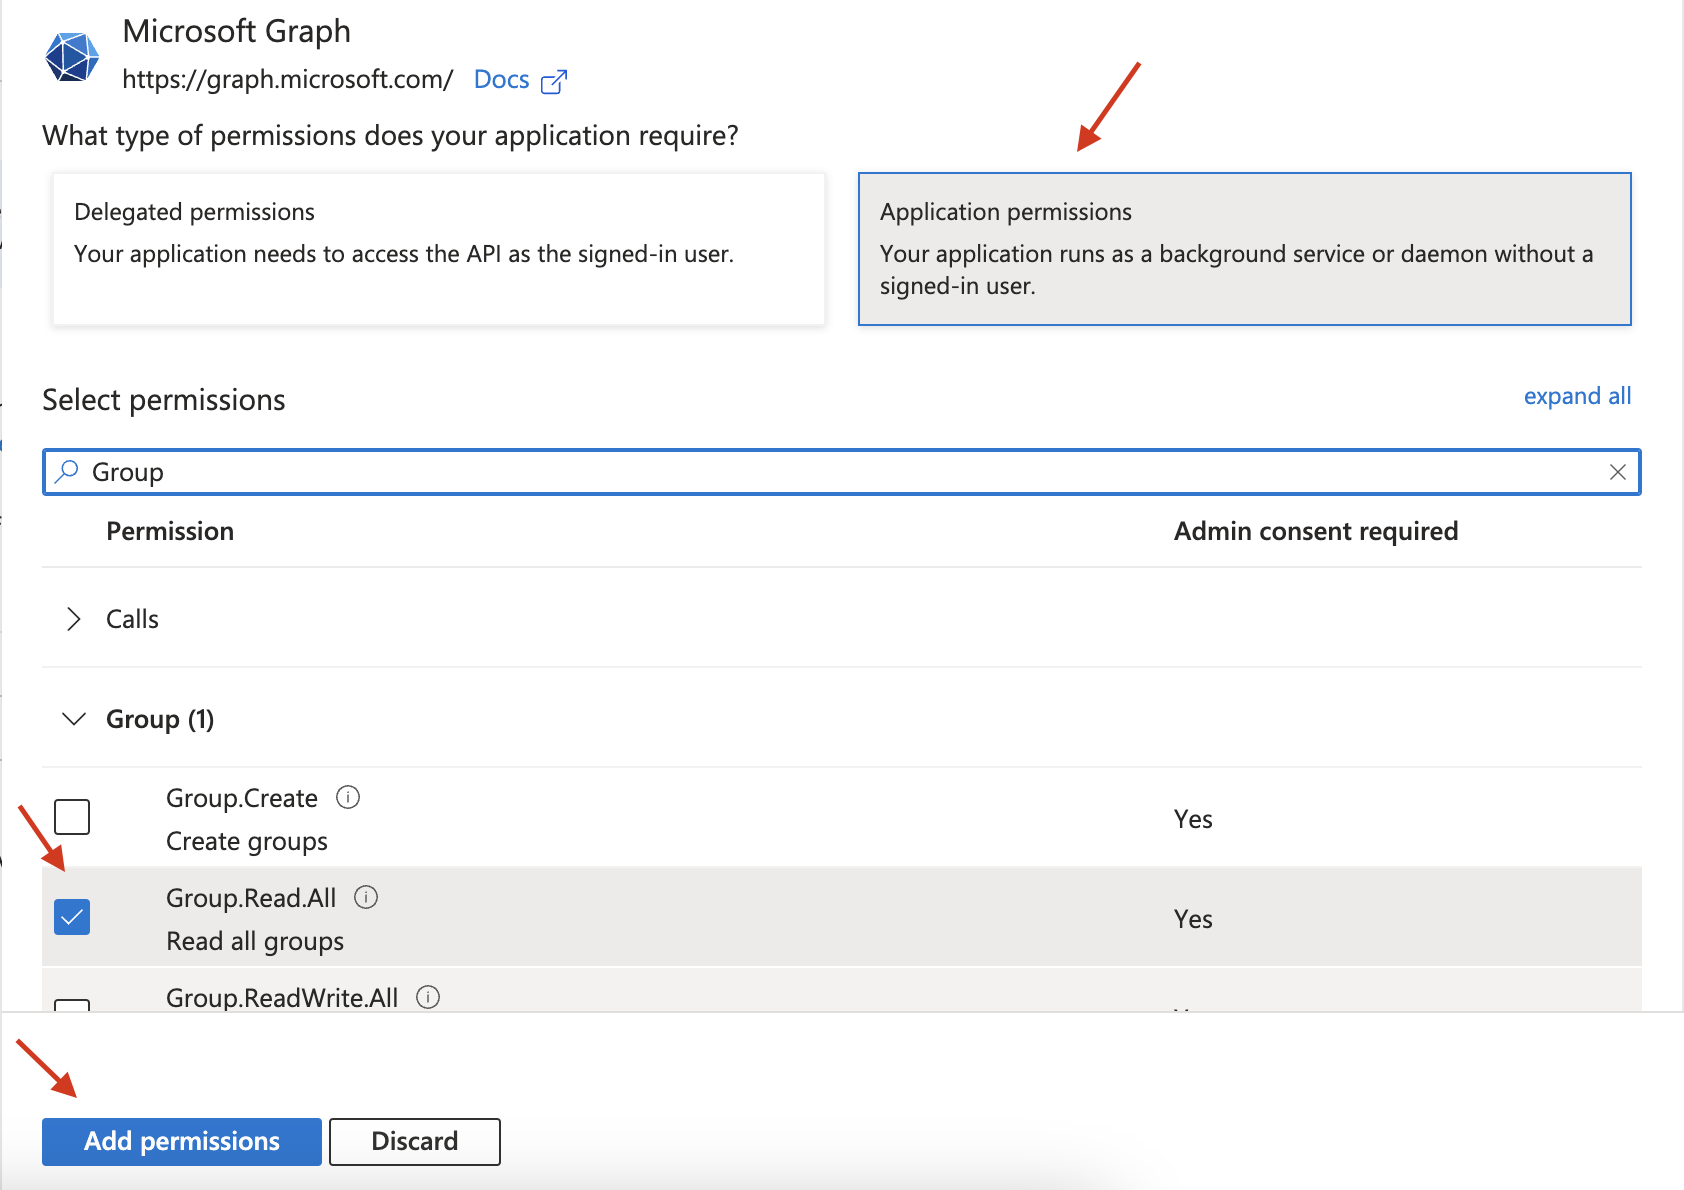
- Select “Group.Read.All” under Application permissions, then click the “Add permissions” button.
- Next, click on the Grant admin consent menu link and then click Yes button to authorize the consent for use with the tenant.
Now that the authentication setup is complete, make sure you have the following information before proceeding to the next step:
- Tenant ID,
- Client ID,
- Secret Value
Create Flow in Power Automate
To initiate a workflow manually, let’s generate an immediate flow using Microsoft Power Automate. Access the Power Automate portal https://make.powerautomate.com, click on the Create option in the left-side navigation menu.
Then, opt for “Instant cloud flow”, specify your desired flow name, select “Manually trigger a flow,” and proceed by clicking the “Create” button.
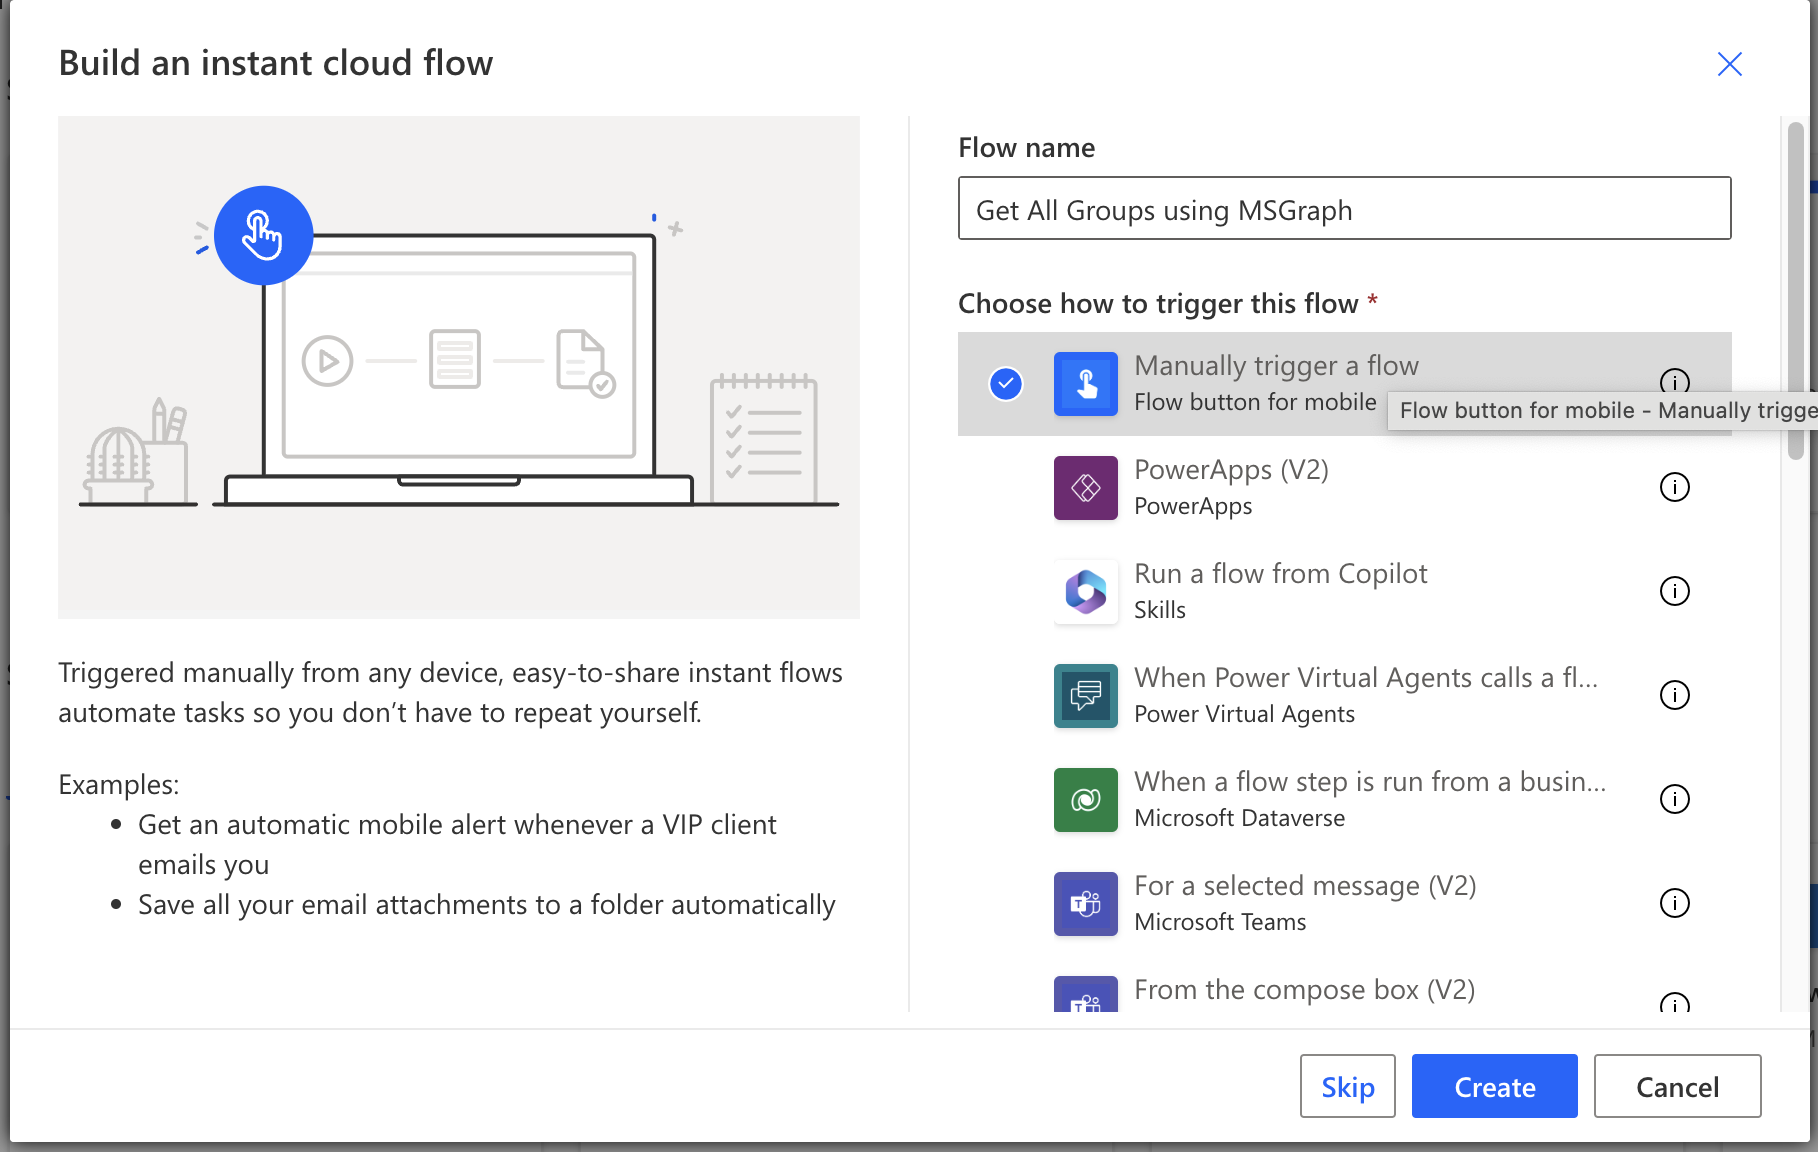
The flow has now been created with “Manually trigger a flow” trigger action. Next, we’ll proceed to authenticate from within the flow.
Get Access Token
Include an HTTP action in Power Automate and populate the following details for each parameter:
| URI | https://login.microsoftonline.com/<tenantid>/oauth2/v2.0/token |
| Method | POST |
| Headers | Key: Content-Type
Value: application/x-www-form-urlencoded |
| Body | grant_type=client_credentials&client_id=<clientid>&client_secret=<clientsecret> &scope=https://graph.microsoft.com/.default |
Substitute the <tenantid>, <clientid> and <clientsecret> with their corresponding actual values.
Then, save the flow by clicking on the “Save” button. Next, initiate a manual run of the flow by clicking on the “Test” button. Upon completion of the test, the output will be delivered in the following format:
{
  "token_type": "Bearer",
  "expires_in": 3599,
  "ext_expires_in": 3599,
  "access_token": "eyJ0eX…..AiOiJK "
}
Copy the value within the “Body” from the output. Proceed by adding the “Parse JSON” action to the flow. Click on “Use sample payload to generate schema” and paste the copied value from the HTTP request output into the designated area.
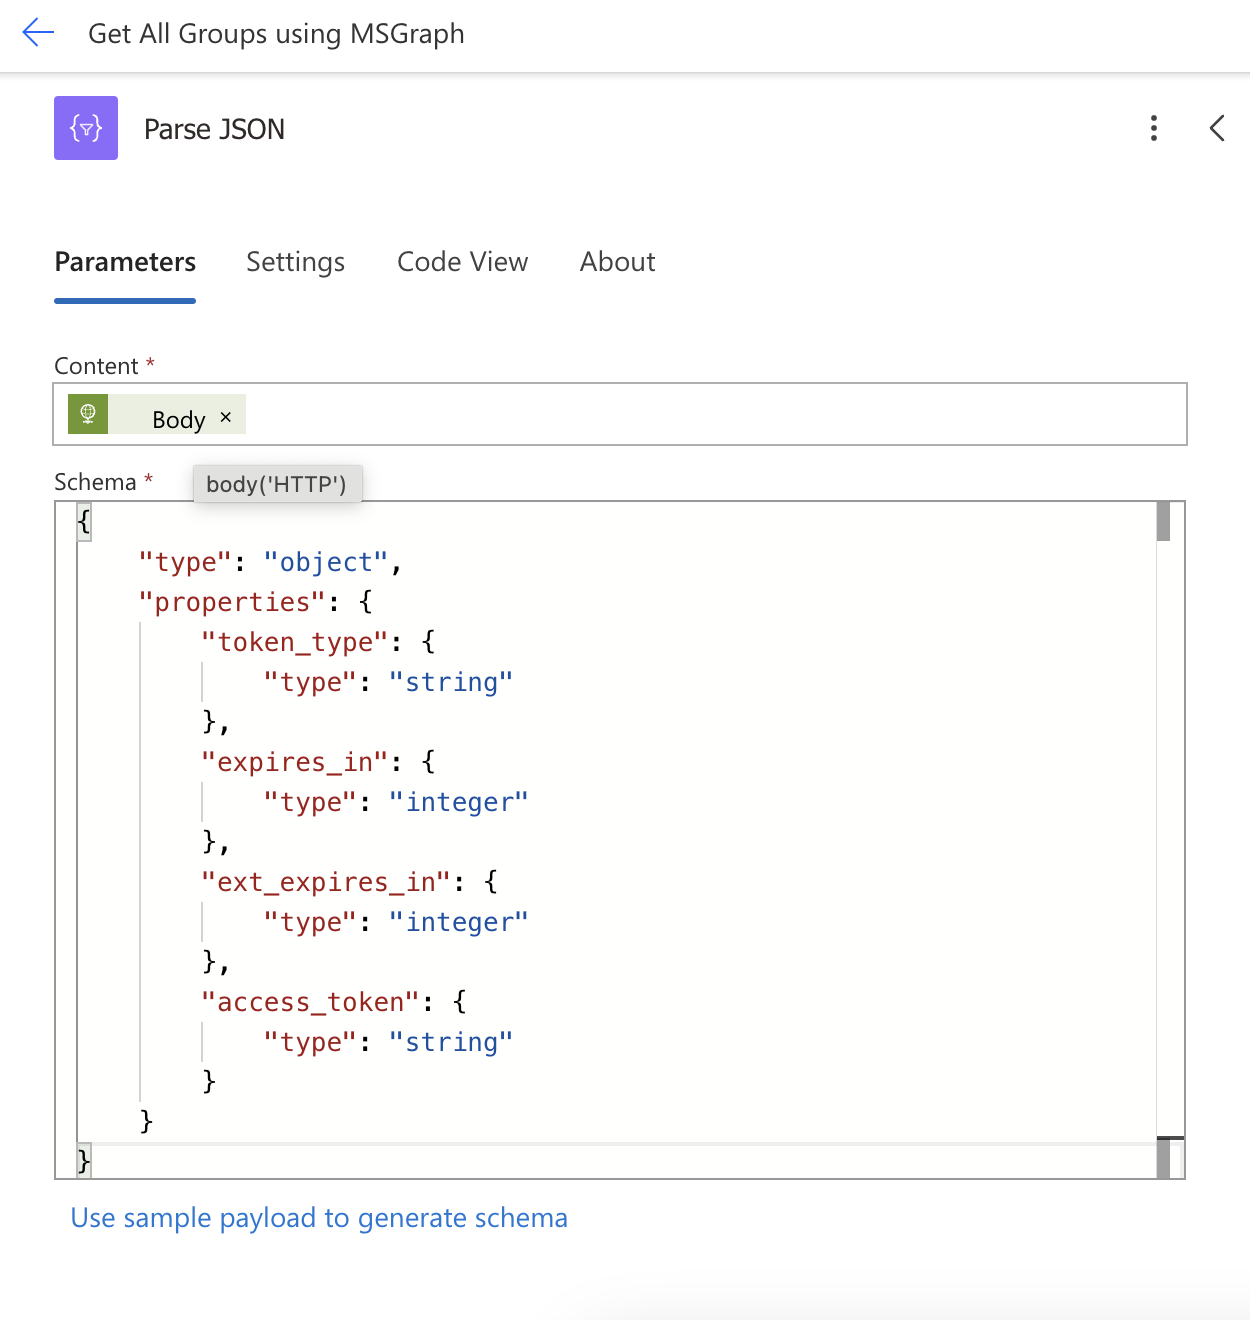
This will generate a schema for the JSON and enable identification of available properties for use in subsequent actions.
Call MS Graph API endpoint
Add another HTTP action and configure it with the MS Graph endpoint to retrieve all groups using the following parameters.
| URI | https://graph.microsoft.com/v.1.0/groups |
| Method | GET |
| Headers | Key: Application-type
Value: application/json Key: Authorization Value: Bearer <Parse JSON – Body access token> |
All the tasks have been completed. Proceed by saving the flow via the “Save” button, then initiate a manual run by selecting the “Test” button. Upon test completion the output will present all tenant groups in JSON format.
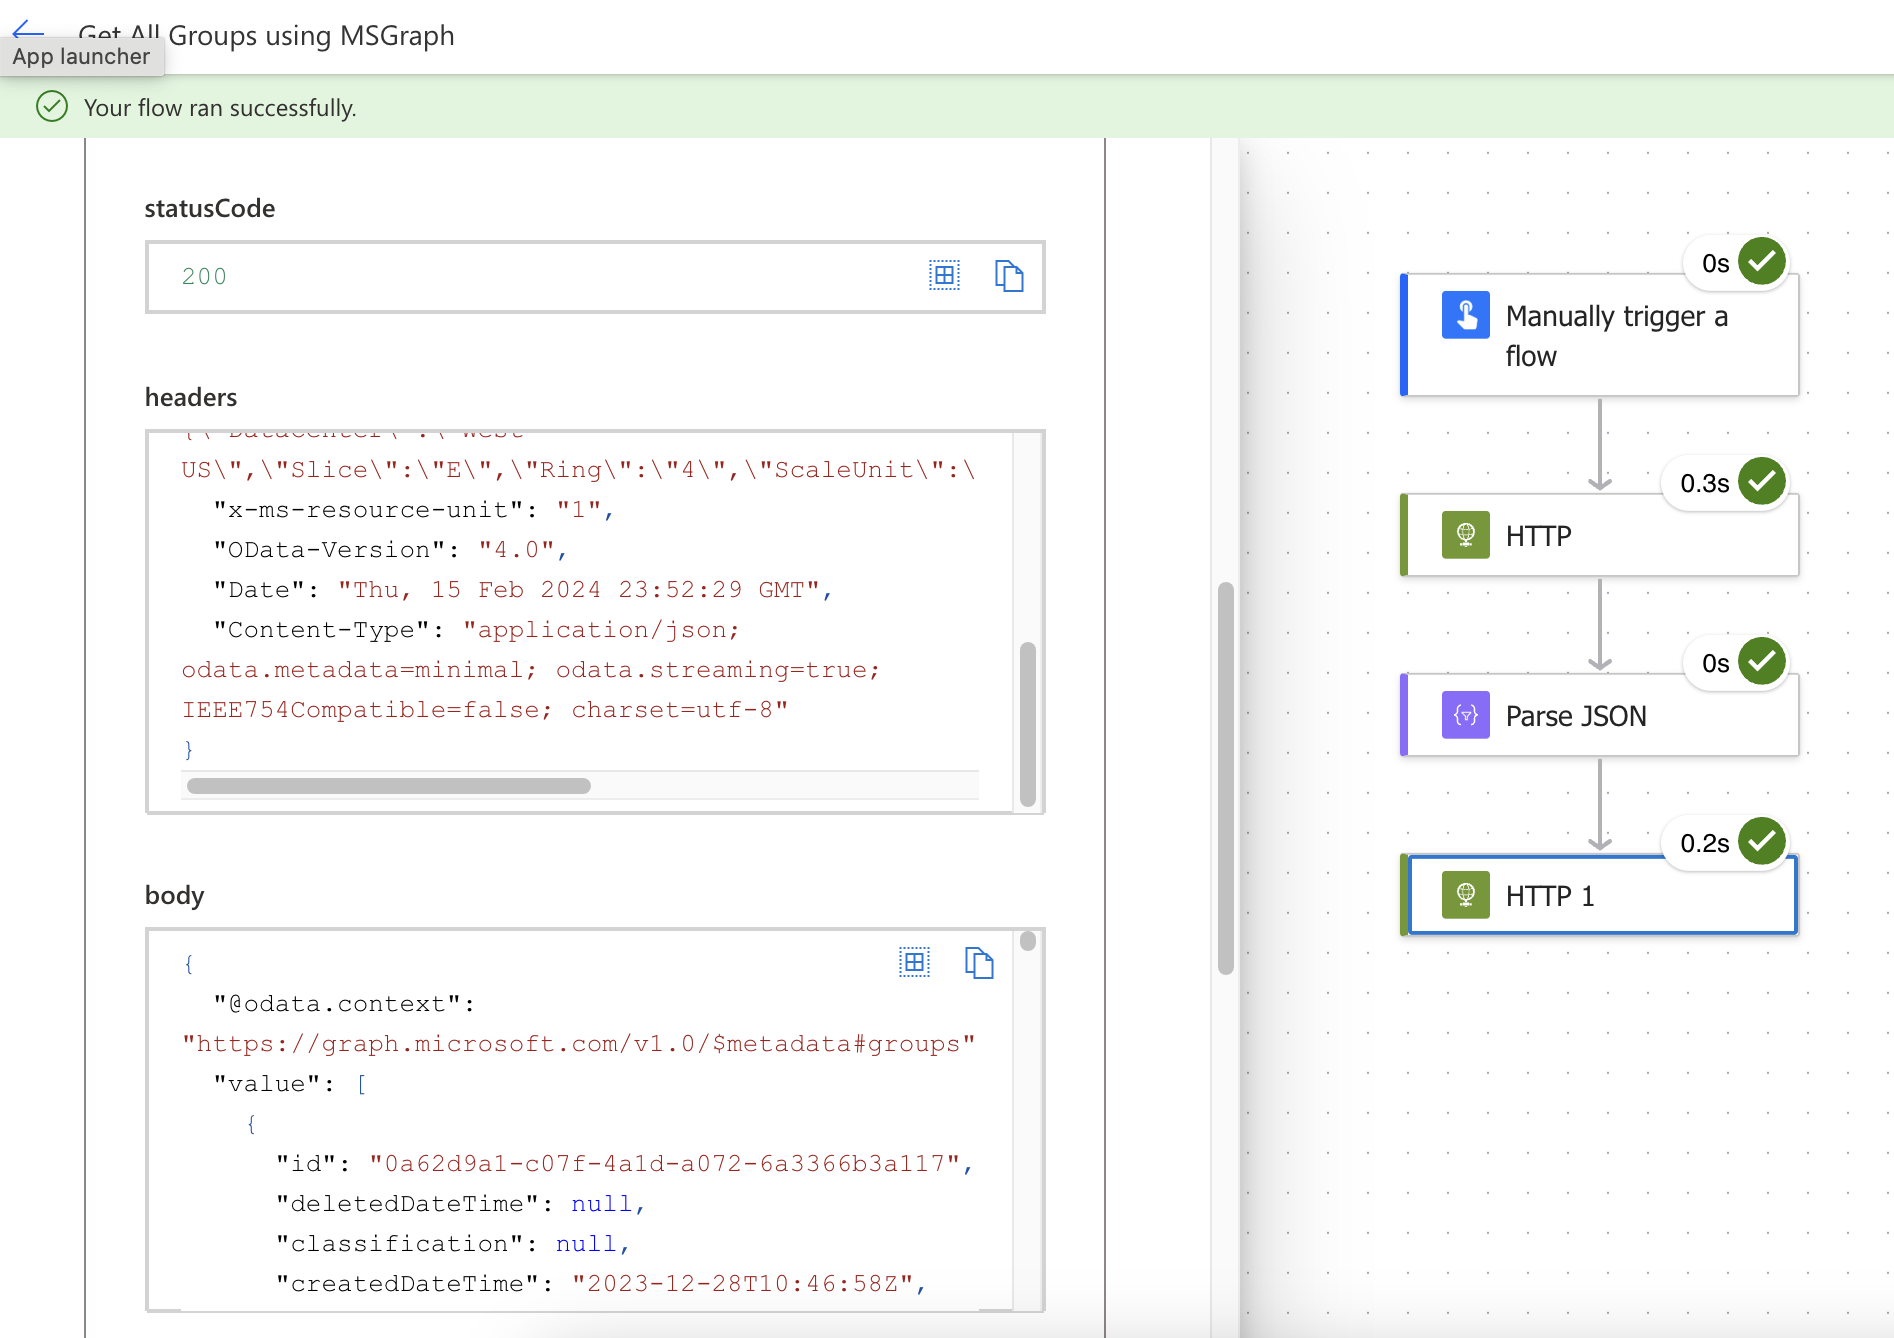
In summary, by following the outlined steps, you can effectively setup and testing of your Power Automate flow by establishing the connection to MS Graph API for retrieving all groups across the tenant. This streamlined process empowers efficient management and utilization of group data within your Microsoft environment.
